Monday, January 29, 2018

Beat Up Car Cake


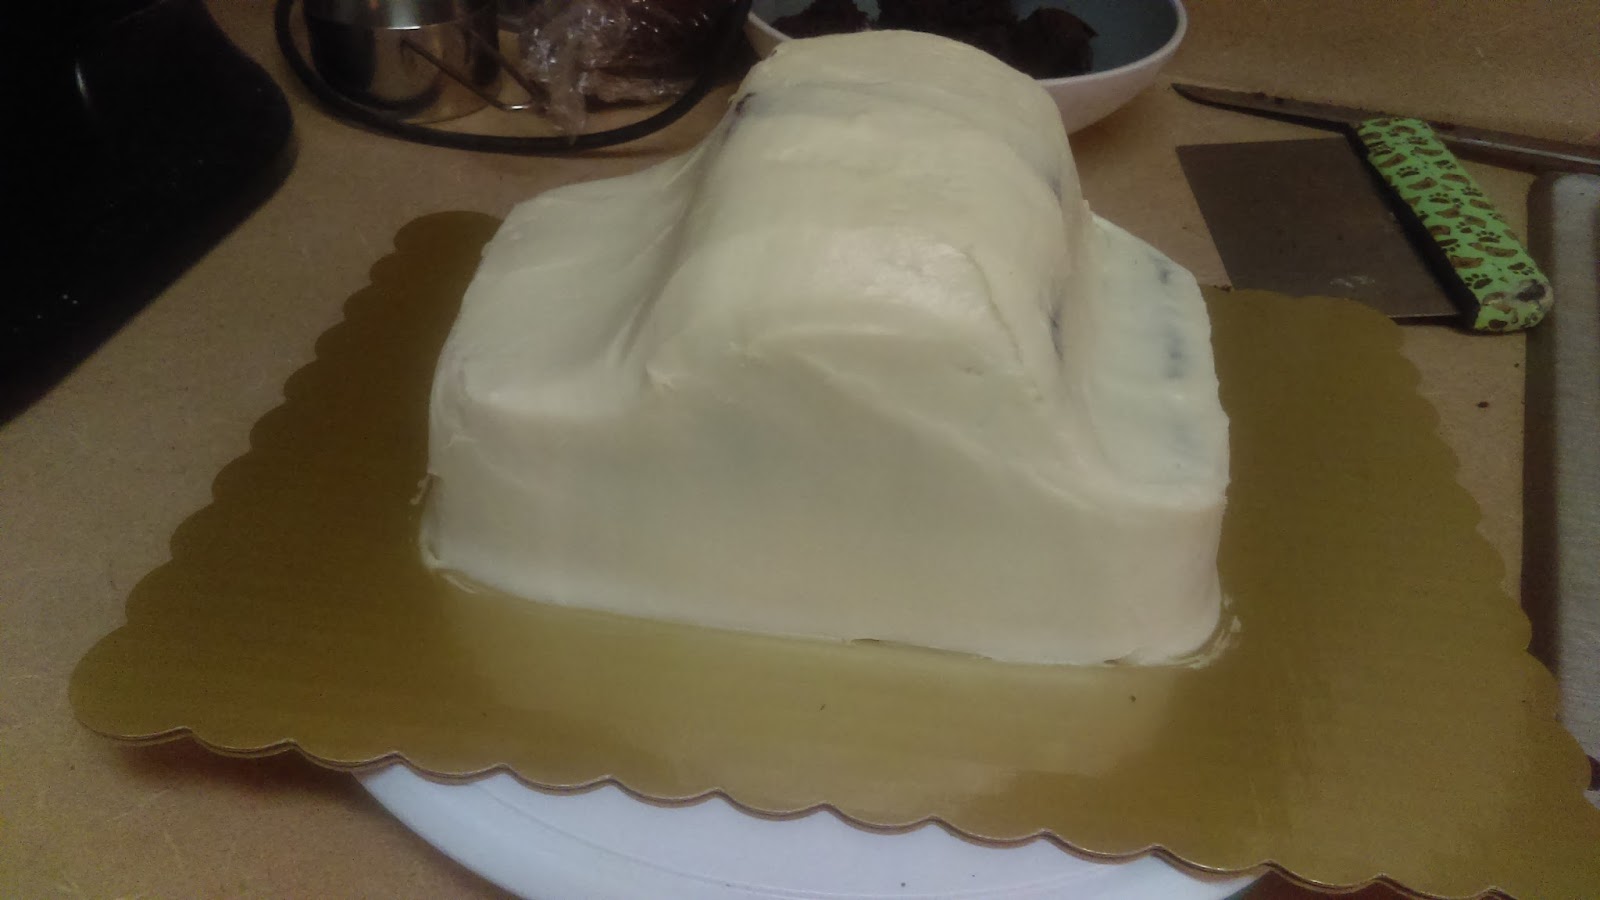
My little brother has managed to run two cars into the ground before his 18th birthday but for his 17th birthday I mad him this cake representing the beat up second car he got from his friend. It looks a lot nicer now but it drives about as well as my cake LOL


I started with 2 layers of delicious chocolate cake these are 8in rounds but it would have been better if they were bigger. I cut them in half and decided I didn't need the 4th half when I was 'gluing' the cakes to the board. I carved out the front and back windshields.


I put a very heavy crumb coat over the whole thing, this may even be a second coat as I usually double coat my chocolate cakes because of the crumbs.
 
Then came the colored details. I put down the black for windshields first, attached my doughnut wheels next, then went in with the red coating most of the car but leaving the hood and back bumper to be done in gray. This doesn't look like the nicest car but I did it because that's what his car looked like at the time.
Then it was just little car details. I added a thick red icing spoiler to the back, some head lights for the front and back, and a little Ford logo on the front. I used a knife to make etchings in the solid buttercream to give the windows and hood more dimension.


He loved his cake and it lasted only slightly less long then the car did ^.~

Wednesday, January 17, 2018

Pegasus Cake with Meringue Wings

Unicorn cakes are all the rage right now but my mother is a fan of pegasus not unicorns so for her birthday I wanted to make a pegasus cake and I found a great reference picture that did this with meringue wings.
So to start I had to try out the meringue wings. I traced some wings on to a piece of paper and put that under some wax paper. when my meringue was ready I put it into a piping back with a leaf tip. Starting with the longest bottom feathers I worked my way up the wing feather by feather. As I pulled away from each feather it pulled up a little but this adds some dimension to the wings that I liked. I finished the tops with some rosette swirls and baked them on 275 for over an hour.


I had lots of extra meringue so I piped it out into swirls to add to my cake as part of the mane later.


Next came the cake. My mum's favorite is angel food so I actually bought them from the store and let me say that getting them out of those containers in one piece was a challenge. I carved them down into a cylinder and filled the center with strawberries and cream. I gave the whole thing a crumb coat in a Chantilly frosting


For the final coat I used straight whipped cream for a pure white appearance.

I did a little experimenting with the ears trying to dip them after cutting (left) or cut them after the white chocolate had set just a little (right). The cutting after the coat had set was definitely a cleaner look and is now my go to but you have to make sure the white chocolate isn't too hard or it'll chip right off your strawberry when you cut it.


This is the point I got to before I ran out of green buttercream. These cakes always take more icing then I think they will for the hair and since I had no time to go out for more ingredients (and dye) I had to improvise and use my whipped cream to make more green for swirls. It wasn't near as dark and the line is very visible from the top.


My mom loved it and she didn't even notice the flaws although she did remind me that she hates whipped cream (but loves chantilly....so....yeah)

Another successful cake from last year. Wonder what I'll do for her this year....

Thursday, January 11, 2018

Wolverine Cake


Here's another cake from last year. I was commissioned to do a wolverine cake for a friend's son. After talking with the mom about the cake she wanted I came up with this sketch. He likes wolverine but being a classy kid he likes the old wolverine style so I looked up his costume to refresh my memory and came up with this bust style cake. I like this style and it's not something I see a lot of other bakers doing but with cartoon characters it's actually pretty simple.


 I started with he mask  which was made from fondant. I made a paper stencil by tracing his mask shape off a very enlarged photo on my computer. Then cut that out of some black fondant, I like to buy my fondant already colored for black as it is usually darker then I could get it on my own and a lot less work. I put this mask to dry on a cocoa powder can which I determined would be about the same size as my 4in cake I would eventually put it on. I made this a day or two in advance so it would have time to fully dry.


I baked my cakes the day before and let them cool in the freezer overnight. The day of the party I iced my cakes in yellow buttercream. I gave the top cake a little rounded dome since heads tend to be round. I put some of my other icing details on my cakes before stacking them.


Then I added my fondant details which was only the mask and belt.


Finished it up with a few more black icing details to really tie the whole thing together.


I really liked how close to my original drawing this one came out and I know the kid loved it.

Saturday, January 6, 2018

White Chocolate Birch Bark Wedding Cake


So this is a cake I worked on last year for my dear friend Beau's wedding. I always start custom cakes by sitting down with the clients and making a sketch with them. I find out what the client wants and (hopefully) represent what the final product will look like. This way I'm sure we are all on the same page. Beau and Elizabeth were having a more rustic wedding in the cold of a Colorado February and wanted a birch wedding cake.


They didn't like fondant so I offered to do the birch effect with chocolate. I practiced it a few times but the technique is pretty simple. You just melt a small amount of dark chocolate and paint different lines onto a piece of parchment. You could put this in the fridge if you don't want any smearing but I felt the mixing effect would add to the realism. Next you melt a bunch of white chocolate and drizzle it heavily over the lines. Spread the while chocolate with even spatula strokes and if you work side to side with the lines the graying effect looks really good.

These cakes were gluten free chocolate and I filled them with fresh strawberries and iced them in a chantilly frosting (which is really just fancy talk for adding whipped cream and almond extract to your cream cheese icing). I always crumb coat specialty cakes but with chocolate ones it's extra important.


It took up my WHOLE fridge! You can't see it but the top shelf was taken up by all the pans of chocolate. I really couldn't do a larger cake without a bigger kitchen.


This cake was going to Silverthorn so I thought it wise to transport in an unstacked format with zero decoration. I showed up to the event hall a couple hours before the wedding and worked in the kitchen assembling the cake. Stacking went smoothly and it didn't matter so much what the underneath cake looked like (so I forgot to get a picture). I pulled out all my chocolate pieces which I had pre-cut, I felt the strait lines of cutting made for better trees then trying to break the chocolate into right sized pieces. I went around the cake starting at the top putting chocolate piece after chocolate piece. There was a scary moment when I thought they might not make it but they did and the effect was just right. I added little buttercream pine cones but there were no extra flowers to add, the last thing was the topper which I added right before presenting.


It was a great time with great people and I was even there to cut the cake ^^

Saturday, December 30, 2017

It's Gingerbread Time Again!!

Once again it's been a whole year with no posts about my crafts but it's one of my New Years resolutions to be better about that this year so I'll be posting several of my projects from the past couple years that I've saved pictures for and working on several new projects this year ^^


For this year I have a brand new gingerbread house!! With the help of my long suffering friend Ileana we created a gingerbread Grand Overlook Hotel complete with rice crispy hedge maze and little frozen Jack.


 As always I started by pulling a bunch of reference photos. This is when I realized that the Stanley hotel here in Colorado (which I've never actually visited) was not the hotel in the movie it's merely the inspiration for the novel. So with this new knowledge I pulled several movie shots and some pictures of the Timberline Lodge in Oregon where the movie was filmed. I also managed to find this 3D model of the hotel which was very useful in helping me create my pattern pieces.

 Last year I found that my card stock patterns didn't fit together nearly as well once baked out of gingerbread because I hadn't accounted for the thickness. So this year I decided to make my model out of cardboard to better simulate the gingerbread. I created a plan of all the pieces I thought I'd need and started my model with the left wing wall setting the scale for the rest. I made the rest of the left wing pieces to a scale that looked right based on pictures. The right wing was a little smaller so I cut an inch off height, no parapet outcrops but I used the same roof pattern for it's own little roof outcrops. The last thing I built was the middle stating with a cardboard place holder for the floor which I used as is in the final building. After my model was complete I took apart the pieces and sprayed them with a canvas coating to help seal the cardboard from the grease of the cookie dough.


 Next there was a whole night of baking and cutting, cooling and sorting. The next morning we started assembly. For this project I had the idea of doing a bunch of line piping to give the building the appearance of paneling, I also though this would be best done while they were flat. That took some time to dry completely and so we assembled other pieces to dry while we waited.


 We got to about here in assembly when we realized the back walls were too low and that the right center roof panel didn't fit at all. We did a little re-baking and cut our roof panel on the fly while it cooled.
 It was all going so well until the Necco Wafers ran out....we called a bunch of stores but in the end the only place we could find the chocolate Necco's was at FizzyWigs. We called it a night till we could go out to the store for more. We bought a total of 16 tubes and in the end we still finished the last panel with nothing but broken scrap.


It was worth it though, and with a final few hours of decorating.


And the hour Ileana spent putting the maze together. We had an AMAZING (haunted) gingerbread hotel.


Which Bob was nice enough to take off my hands for his Messiah party which meant it actually got eaten and enjoyed ^^

Saturday, December 31, 2016

Another Year and Another Gingerbread House

    So it's been a whole year since I wrote a blog post about any of the craft things I've been doing, and I have been quite crafty this year. My friend and I started our own business selling up-cycled thrift store duds and we even got our own booth at the Denver Punk Rock Flea Market this December. It took a whole year to get all the product together to sell and in the end while it was really exciting I missed out on other things I wanted to be doing this year so going forward there will be less work done but more pictures, which is way more important ^^ don't you agree?

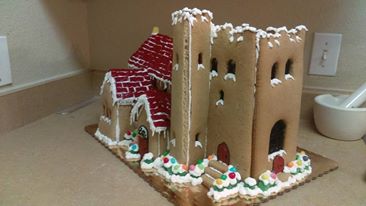
   This post is about my yearly gingerbread house though. This year I chose my inspiration as a tribute to a life long friend of mine Bob, he has run the Boulder Messiah for 34 years! Conducting 3 shows in one weekend every Christmas. It is through his passion for Messiah and years of time and money that this year was his 100th Messiah!!!!! In tribute to this amazing tradition that I have personally been a part of for 27 years I drew my gingerbread inspiration from the church we hold it in every year St. John's Episcopal in Boulder.
   Over several days I looked at pictures of the church from all angles to design a gingerbread pattern. Then I decided on my dimensions for my church mostly determined by the height and width of the card stock paper I was using. This is what all the pieces laid out (approximating the building profile) look like.


    I laminated this and used it to cut out all the pieces of gingerbread I used to create my gingerbread tribute to St. John's. It took almost 20 hours over two days to cut out and bake the 30 or so pieces used to make this yet to be decorated version.
   Lots of people ask me what the windows are made of. The answer is that I broke up jolly ranchers into fairly large pieces and sprinkled them into the holes. It's best to only do this if your gingerbread is on a parchment paper baking so the sugar doesn't stick but to be honest I still lost several windows and next time I think I'll cut the windows bigger and put bigger pieces in them, perhaps even whole jolly ranchers.

It took another 8-10 hours to get the supplies and decorate this rough, plain looking gingerbread house into an edible masterpiece that I presented to Bob at the intermission of his 101st show.


Wednesday, December 23, 2015

Gingerbread Kremlin

So last year I started out this blog with my Gingerbread Tardis now it's been a year and I've gotten quite a lot less posted then I wanted to but we've come full circle to my next gingerbread undertaking and I'll say it right now, I was a little overly ambitious but it turned out pretty well. (I apologize for my lack of pictures)
How did I begin such an epic undertaking you ask? Well it started with getting reference pictures of other insane (probably professional) people who made gingerbread Kremlins.

I also looked at a lot of pictures of St. Basil's Cathedral and made a sketch of what I wanted it to look like. I figured out that it was really 4 large towers with 3 octagonal levels, 4 smaller towers with just one octagonal level, around a very tall main tower. I also wanted to build the cool entrances that I noticed some people left off their interpretations of the cathedral. From that sketch and using my mad architectural skills I was able to figure out how many walls I was gonna need and of what type (main tower, levels 1, 2, or 3, etc.)
   Now I needed a scale so I could start drawing out my pieces and creating a simple mock-up. I chose an entrance piece (because it would be one of the smallest) and I decided it would be 4in by 4in. I decided to make my Entrance Staircases go up by an inch and I was going to have tow of them making my Large Tower Bases be 6 inches tall. I then decided 4 inches across gave it a good look. Now I had to figure out how big 8 of those pieces would be, I made 8 of them out of card stock paper and taped them together. I used my ruler to figure out about how tall/wide it was (I'm sure there is math that could have figured this out for me but I need a visual representation to really see how big my next pieces need to be so this works). I measured out my octagonal Tall Tower Base piece. I repeated this process with the Second Level pieces and the Third Tower pieces which were also my Small Tower pieces. I was also going to need rectangular Small Tower Base pieces with square roofs. I stacked my towers up to see how tall they were to figure out how tall my Main Tower needed to be. I decided on making an 'ugly' square bottom piece to bring it to my 1st floor roof level then making a tall octagonal Main Tower with a flat roof. I designed tall pointed roofs for the main tower and entrances but later decided to use ice cream cones for simplicity/sanity. So how many pieces was it? like 400. I also took the lesson learned from my tardis and laminated all my pattern pieces so they would not get greasy.
   How much gingerbread is that? A lot but I needed to figure out how many batches. A standard gingerbread house is 10" x 7" at least that's what my recipe made. I decided to take my pieces and lay them out on my pans and see how many I could get (I made a whole list of how many pieces on each pan all for naught since I ended up with lots of different sized pans and it was way easier to just go one piece at a time till you had all of them) but this gave me the estimate of 40ish pans of gingerbread. Knowing that I had recently gotten like 4-5 pans of cookies out of the recipe  I figured I was gonna need like a 10 times recipe. (I also tried guessing at that each tower level was like 1 gingerbread house but this left me with needed like a 20 times batch that was going to be costly and unreasonable in size and weight) This is by no means a small amount of gingerbread it weighed roughly 30lbs and I used the industrial mixer at work to mix it (carrying it too and from work was lots of fun too). I had it wrapped in approximately 3lb logs in plastic wrap, keeping them in the fridge as long as possible before transport and after I got it home.
   How do you bake 400 pieces of gingerbread? With help. I had a friend come over and spend nearly 12 hours (that's how much time I spent) helping me roll out dough and cut pieces according to the patterns I had which said how many they needed on them. As I said earlier I came up with a whole plan for laying them out which in hindsight had things unreasonably close together but you also need quite a lot of pans to be cutting, baking, and cooling on and I only have 4 so I borrowed some pans along with quite a lot of cooling racks from my friend's mother (the friend who started all this madness). These pans were of vastly different sizes then mine so the plan went out the window from the start (as the always do.....) but it turned out to be easier to keep track of things for us each to choose and piece and roll, cut, and bake (then trim while hot this is an important step) that piece till we had enough. It took me 12 hours and at the end of the day we ran out of dough with pieces not done, broke a couple pieces, baked a couple of extras, and burnt a few (especially thin and small ones).
(yes that's me in the back)
   So what do you do when you don't have all your pieces and some are lumpy and too thick/thin? in a proffesional kitchen you make more gingerbread and bake again the next day but this was the only day for me and I was out of gingerbread supplies so I improvised. I kinda knew this project was huge and unwieldy so I had spent much of my time coming up with solutions to problems we might encounter including too few pieces. We were gonna make hexagonal towers instead of octagonal we also got rid of the tall tower in the back (you didn't notice). It turned out to be a good choice since as we found out with the main tower which was going to be octagonal but when we fitted all the pieces around we found them all too big (maybe I didn't trim enough) but I think it's because I hadn't accounted for the width of the gingerbread when making my paper models.We built the first level starting with the square Main Tower Base which we put some tupperware into for support purposes. Then the hexagonal Tall Tower Bases (only 3 of them). Then the Small Tower Bases. We were using Royal Icing to attach everything because it sets really hard and fast, it's basically gingerbread superglue.

Next we built the 'octagonal' Main Tower upside-down which became a heptagonal tower when all of the pieces wouldn't fit around the octagonal roof piece (didn't notice that either but I took no pictures of the back for that reason). We chose to decorate the main tower while upside-down not sure if that was the best idea but it worked out. We put royal icing on the open top and very carefully flipped it trying our best to center it on the base. Level two of the main towers was just level one again only smaller. Then the Small Towers and the Tall Tower third levels were just yet smaller versions.We tried to do some decorating as we went because we knew that some places would become unreachable as we built.


 The Kremlin has all these beautiful little archways all over it and I had originally planned to bake a bunch of gingerbread circles to cut in half and use but when we ran out of gingerbread we got vanilla wafers instead. We decided to keep most of them whole to create the graduated effect that the real ones have, they stack a lot like scales.


So what am I going to use to create the 'onion tops'? Meringue was the plan but I really needed a lot more of it. I piped them as big as I could manage and baked them overnight. In the morning I trimmed them to give them the onion shape.

(All of the pictures are Lenna's I took very few)

At this point we made a candy run. We needed more vanilla wafers and the onion domes were gonna need some candy color to make them big and to start making this project look less like a cobbled together monstrosity. We got gumdrops, marshmallows, and twizzlers. We pulled up some pictures of the cathedral but really we were just winging it, it was nearing 6 hours and I had places to be. At this point it was merely Kremlin inspired and we were just throwing candy on it to make it look good. Getting those gumdrops to stay was quite difficult so I recommend the marshmallows or maybe M&M's. We also built our entrance ways which took a little modification because they were too long to stand on their own and the internal walls hadn't gotten built. Now we just spent our time decorating, I made some green royal icing and we had some white and we went around piping decoration and attaching candy.
For scale it stands like 2 and half feet tall and is over 30 inches wide. I promise we had fun making it but when it gt to the end of 8 hours of construction we were both sick of looking at it.
(oh yes I had to move it out of my parents house and into a different house that was fun)


In the end it got made in the time I had and nobody tried to kill me for putting them through this and everyone at the party enjoyed it

(yes I had to smash it)