Wednesday, December 23, 2015

Gingerbread Kremlin

So last year I started out this blog with my Gingerbread Tardis now it's been a year and I've gotten quite a lot less posted then I wanted to but we've come full circle to my next gingerbread undertaking and I'll say it right now, I was a little overly ambitious but it turned out pretty well. (I apologize for my lack of pictures)
How did I begin such an epic undertaking you ask? Well it started with getting reference pictures of other insane (probably professional) people who made gingerbread Kremlins.

I also looked at a lot of pictures of St. Basil's Cathedral and made a sketch of what I wanted it to look like. I figured out that it was really 4 large towers with 3 octagonal levels, 4 smaller towers with just one octagonal level, around a very tall main tower. I also wanted to build the cool entrances that I noticed some people left off their interpretations of the cathedral. From that sketch and using my mad architectural skills I was able to figure out how many walls I was gonna need and of what type (main tower, levels 1, 2, or 3, etc.)
   Now I needed a scale so I could start drawing out my pieces and creating a simple mock-up. I chose an entrance piece (because it would be one of the smallest) and I decided it would be 4in by 4in. I decided to make my Entrance Staircases go up by an inch and I was going to have tow of them making my Large Tower Bases be 6 inches tall. I then decided 4 inches across gave it a good look. Now I had to figure out how big 8 of those pieces would be, I made 8 of them out of card stock paper and taped them together. I used my ruler to figure out about how tall/wide it was (I'm sure there is math that could have figured this out for me but I need a visual representation to really see how big my next pieces need to be so this works). I measured out my octagonal Tall Tower Base piece. I repeated this process with the Second Level pieces and the Third Tower pieces which were also my Small Tower pieces. I was also going to need rectangular Small Tower Base pieces with square roofs. I stacked my towers up to see how tall they were to figure out how tall my Main Tower needed to be. I decided on making an 'ugly' square bottom piece to bring it to my 1st floor roof level then making a tall octagonal Main Tower with a flat roof. I designed tall pointed roofs for the main tower and entrances but later decided to use ice cream cones for simplicity/sanity. So how many pieces was it? like 400. I also took the lesson learned from my tardis and laminated all my pattern pieces so they would not get greasy.
   How much gingerbread is that? A lot but I needed to figure out how many batches. A standard gingerbread house is 10" x 7" at least that's what my recipe made. I decided to take my pieces and lay them out on my pans and see how many I could get (I made a whole list of how many pieces on each pan all for naught since I ended up with lots of different sized pans and it was way easier to just go one piece at a time till you had all of them) but this gave me the estimate of 40ish pans of gingerbread. Knowing that I had recently gotten like 4-5 pans of cookies out of the recipe  I figured I was gonna need like a 10 times recipe. (I also tried guessing at that each tower level was like 1 gingerbread house but this left me with needed like a 20 times batch that was going to be costly and unreasonable in size and weight) This is by no means a small amount of gingerbread it weighed roughly 30lbs and I used the industrial mixer at work to mix it (carrying it too and from work was lots of fun too). I had it wrapped in approximately 3lb logs in plastic wrap, keeping them in the fridge as long as possible before transport and after I got it home.
   How do you bake 400 pieces of gingerbread? With help. I had a friend come over and spend nearly 12 hours (that's how much time I spent) helping me roll out dough and cut pieces according to the patterns I had which said how many they needed on them. As I said earlier I came up with a whole plan for laying them out which in hindsight had things unreasonably close together but you also need quite a lot of pans to be cutting, baking, and cooling on and I only have 4 so I borrowed some pans along with quite a lot of cooling racks from my friend's mother (the friend who started all this madness). These pans were of vastly different sizes then mine so the plan went out the window from the start (as the always do.....) but it turned out to be easier to keep track of things for us each to choose and piece and roll, cut, and bake (then trim while hot this is an important step) that piece till we had enough. It took me 12 hours and at the end of the day we ran out of dough with pieces not done, broke a couple pieces, baked a couple of extras, and burnt a few (especially thin and small ones).
(yes that's me in the back)
   So what do you do when you don't have all your pieces and some are lumpy and too thick/thin? in a proffesional kitchen you make more gingerbread and bake again the next day but this was the only day for me and I was out of gingerbread supplies so I improvised. I kinda knew this project was huge and unwieldy so I had spent much of my time coming up with solutions to problems we might encounter including too few pieces. We were gonna make hexagonal towers instead of octagonal we also got rid of the tall tower in the back (you didn't notice). It turned out to be a good choice since as we found out with the main tower which was going to be octagonal but when we fitted all the pieces around we found them all too big (maybe I didn't trim enough) but I think it's because I hadn't accounted for the width of the gingerbread when making my paper models.We built the first level starting with the square Main Tower Base which we put some tupperware into for support purposes. Then the hexagonal Tall Tower Bases (only 3 of them). Then the Small Tower Bases. We were using Royal Icing to attach everything because it sets really hard and fast, it's basically gingerbread superglue.

Next we built the 'octagonal' Main Tower upside-down which became a heptagonal tower when all of the pieces wouldn't fit around the octagonal roof piece (didn't notice that either but I took no pictures of the back for that reason). We chose to decorate the main tower while upside-down not sure if that was the best idea but it worked out. We put royal icing on the open top and very carefully flipped it trying our best to center it on the base. Level two of the main towers was just level one again only smaller. Then the Small Towers and the Tall Tower third levels were just yet smaller versions.We tried to do some decorating as we went because we knew that some places would become unreachable as we built.


 The Kremlin has all these beautiful little archways all over it and I had originally planned to bake a bunch of gingerbread circles to cut in half and use but when we ran out of gingerbread we got vanilla wafers instead. We decided to keep most of them whole to create the graduated effect that the real ones have, they stack a lot like scales.


So what am I going to use to create the 'onion tops'? Meringue was the plan but I really needed a lot more of it. I piped them as big as I could manage and baked them overnight. In the morning I trimmed them to give them the onion shape.

(All of the pictures are Lenna's I took very few)

At this point we made a candy run. We needed more vanilla wafers and the onion domes were gonna need some candy color to make them big and to start making this project look less like a cobbled together monstrosity. We got gumdrops, marshmallows, and twizzlers. We pulled up some pictures of the cathedral but really we were just winging it, it was nearing 6 hours and I had places to be. At this point it was merely Kremlin inspired and we were just throwing candy on it to make it look good. Getting those gumdrops to stay was quite difficult so I recommend the marshmallows or maybe M&M's. We also built our entrance ways which took a little modification because they were too long to stand on their own and the internal walls hadn't gotten built. Now we just spent our time decorating, I made some green royal icing and we had some white and we went around piping decoration and attaching candy.
For scale it stands like 2 and half feet tall and is over 30 inches wide. I promise we had fun making it but when it gt to the end of 8 hours of construction we were both sick of looking at it.
(oh yes I had to move it out of my parents house and into a different house that was fun)


In the end it got made in the time I had and nobody tried to kill me for putting them through this and everyone at the party enjoyed it

(yes I had to smash it)


Wednesday, June 3, 2015

Dr Who Spice Rack

I have this spice rack my grandparents gifted me with one year for Christmas. It is a fine spice rack and Dave and I use it often. Right now we use only 6 or 7 of the spices from the rack and have various other jars and bag around for our other spices. Since the spice rack has 24 jars this makes me thing I need to better utilize my spice rack. I had an idea that if I painted the lids with chalkboard paint I would be able to write on the lids exactly what I wanted and change the things in them as I wanted.


I started by removing all the contents into labeled baggies and deciding which spice I wanted to keep. Then I cleaned the jars which had sat next to our stove for years without cleaning and they had quite the layer of grime.


After the jars and lids were sparkly clean I took the lids and wrapped masking tape around each one so I could just paint the top bit with chalkboard paint.


Next I wanted to give the glass jars a frosted coating for a more sophisticated looking background to paint my Dr.Who Gallifreyan writing on.


 I went to online to find a Gallifreyan Translator since I'm not that much of a geek and typed in the word 'spice'. I tried many different things but this one was just complex enough to be cool but still doable and could fit into the space available. I used a circle template to create the symbol on a scrap of paper I could then slip inside each spice jar. I used a bit of stuffing to keep the paper in place while I carefully traced the design on each jar individually with my glass paint.


It took a few hours for the paint to dry enough to flip the jars over and paint the other side but the slowing bit was my hand and wrist tiring and I ended up doing it slowly over the course of 3 days.


I had already consolidated my spices and decided the 24 spices that would be in my jars. I used chalk to draw on the labels but they can be easily changed.


Now all that's left is putting all the spices back in their jars. I like the subtlety of my custom Dr.Who spice rack it doesn't have to be all blue and shaped like a Tardis despite what the internet will have you believe.

Wednesday, May 27, 2015

Plush Dice Set


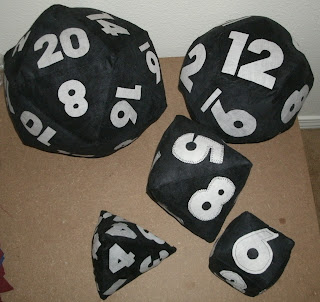
I wanted to start getting into making stuffies. I have a lot of stuffed animals but I've never tried making one myself. I though I'd start with something easy, like a set of dice complete with D4, D6, D8, D10, D12, and D20! I found a tutorial online that said basically what I thought, which was, to make stuffed dice you just had to cut out the shape of the die side the number of side there are on said die. A D4 is a triangular pyramid with 4 triangular sides. A D6 is a cube with 6 square sides. A D8 is an octahedron with 8 triangular sides. A D10 is a pentagonal trapezohedron (yeah really) with 10 lopsided diamond sides. A D12 is a dodecahedron with 12 pentagonal sides. A D20 is an icosahedron with 20 triangular sides.


 I made a pattern starting with the size of the numbers I wanted to use, finding a picture of some simple block numbers I thought would be easy to cut out 500 of later. I made both big numbers for the single digit dice and small numbers for the dice going into double digits. Then I used these to size the shapes for the sides again finding templates (shapes) online. My patterns can be seen here.

Now I needed to find cool fabric to make my dice out of and some plain fabric to make my numbers out of. I went rooting through my fabric box and found some cool ones, a maroon and a blue cotton, a dark blue and a light purple satin, and I also chose a fabric I had a lot of to make a test die of each type out of, a black swede. I cut out each side individually pinning the patten onto the fabric each time and removing the layers when they became too thick (it was quite a lot of sides).

Next I began pinning and sewing the sides together in the fashion of these paper dice (Dice Template). I started by just doing one of each die in my test fabric, the black swede.


Next I went to the fabric store for 'Pellon Wonder Under' which is a magical tool you can iron onto a fabric of your choosing, cut out the shape you want, peel off the backing, and iron onto whatever you want! I added up all the numbers of all the dice I was doing and calculated how much space they would take up and figured that I would need like 8 yards of this stuff, but this was assuming I spaced them out to take up as much space as the largest number. I ended up finding this 'Heat-n-bond' stuff that is exactly the same, but cost like $2 less at the store, and decided to only get 5 yards knowing I would draw my numbers as close together as possible. I drew all the numbers on the paper side starting with the ones so they could lay flat against the sides and stack closely together. I would scroll the paper up as I went along to make it easier to handle. I had already figured out how many of each number I needed and wrote that number on my pattern. I kept track of how many I had already drawn by giving it a number designation in the corner. I cut the Heat-n-bond as long as I could fit on my piece of fabric and then ironed these big strips onto my white fabric.
Now I began cutting these numbers out. This mostly took time, a lot of patience, and a tiny pair of scissors. I cut out over 400 numbers with 250 of them being the small numbers. You may notice that they are all backwards (you may also notice the big sevens aren't, I had to redo them) The reason being that to apply them to my dice I will peel off the paper side you're seeing and place that side onto my dice sides. I placed the numbers as seen in my dice template, checking and double checking that I had one of each number and that they were all there. I carefully centered each number, taking into account the seems I would be sewing on all sides. Then I ironed on each number individually moving along slowly and making sure I gave each number enough time to fully stick. It was very easy to do with the black swede fabric as it was dark and the white fabric for the numbers was thin so the numbers would get darker when they were fully set.
 Being the first time I've used this stuff, and because it does, in fact, say 'iron on and then sew' I didn't know how well they would stay on but I didn't want to sew all of them if I didn't have to. These being my test runs I tried many different stitch patterns around all the edges of the numbers. I chose to do it in black thread cause I was hoping to add some interesting detail but most of the stitching looks sloppy and better off hidden in my opinion. I then sewed these together into their shapes, the D4 and D6 being the easiest to logically figure out I started there bring sides closest together, pinning and sewing each one at a time, keeping all the numbers on the inside of course.


Don't forget to leave a small opening in your last side so you can turn it inside out as I've done here though I would recommend leaving them tuned in for washing (as I did).


After washing them (because the black fabric stunk something awful) I turned each inside out and began stuffing them. The bag of stuffing came with a stick that looks identical to a chopstick but there was only one of them. I used to to make my corners nice and pointy and I tried to use it to shove stuffing into the corners once the dice were mostly stuffed. The small ones turned out quite well but the bigger ones seem more beach ball, they are all roll-able, useable, plushy, dice though!

Saturday, April 4, 2015

Easter Eggs!!!

I haven't posted in awhile and I've been lagging behind in my crafting. So today I'm gonna start out small and make some fun easter eggs, tis the season after all. I found this picture of tie-dyed easter eggs and the description made it sound really easy, not to mention I already had everything I needed. To start I hard boiled the eggs to an easter bunny approved level of firmness (20mins). Then I ran cold water over them until they were cool enough to touch, drained the water, and gave them some time to dry a little. All you need for this is a paper towel, vinegar, food coloring, and eggs!
Soak the paper towel in the vinegar, I tried this once ringing it out and once not, doesn't seem to make much difference. I laid it out in my Pyrex baking dish to same my counters when I dripped food coloring on the soaked towel.
Then rolled the eggs individually in my 'tie-dye' sheet.
 Let it sit for a few seconds and done! I said it was super easy...

Tuesday, March 10, 2015

Book-Safe

I love making book-safes and I have made no less then 8 so far. I find them to be eternally useful and a cool decoration for anywhere. They're also super easy and cheap to make. I've made them for gifts to family, as unassuming safes for money (mostly just my foreign change), and this one I'm hoping to make as a keepsakes box for all the stuff I brought back from France.
I started by going to the thrift store and getting a book, any old book will do as long as it's hard cover and big enough to fit what you want to put inside. I first selected a book that, after reading the dust cover on, I couldn't cut into until I read so I had to select a different book that I had no interest in. I also needed some claps, I chose some plastic spring clamps but I've done this before using my parents C-clamps. Lastly you need glue and some foam brushes, I already had Mod Podge at home but Elmer's glue would have worked just as well.

I started by removing the dust cover and lightly gluing the last page of the book to the back cover. I did this for the last 5-10 pages and then flipped the book over. I usually like to leave the first few pages of the book loose for whatever reason, so after choosing which page I wanted to eventually cut into I left the few aside and clamped the corners of the rest of the book. I then went around with my glue and coated the outside of the pages. You might have to release the clamps and really press the glue in there depending on the book, just make sure it's good and coated. This is gonna have to sit and dry for awhile, I left mine for a couple of hours before removing the clamps. I also placed a pencil case under the feet of the clamps so they wouldn't make indentations in the pages, which I've had happen before.
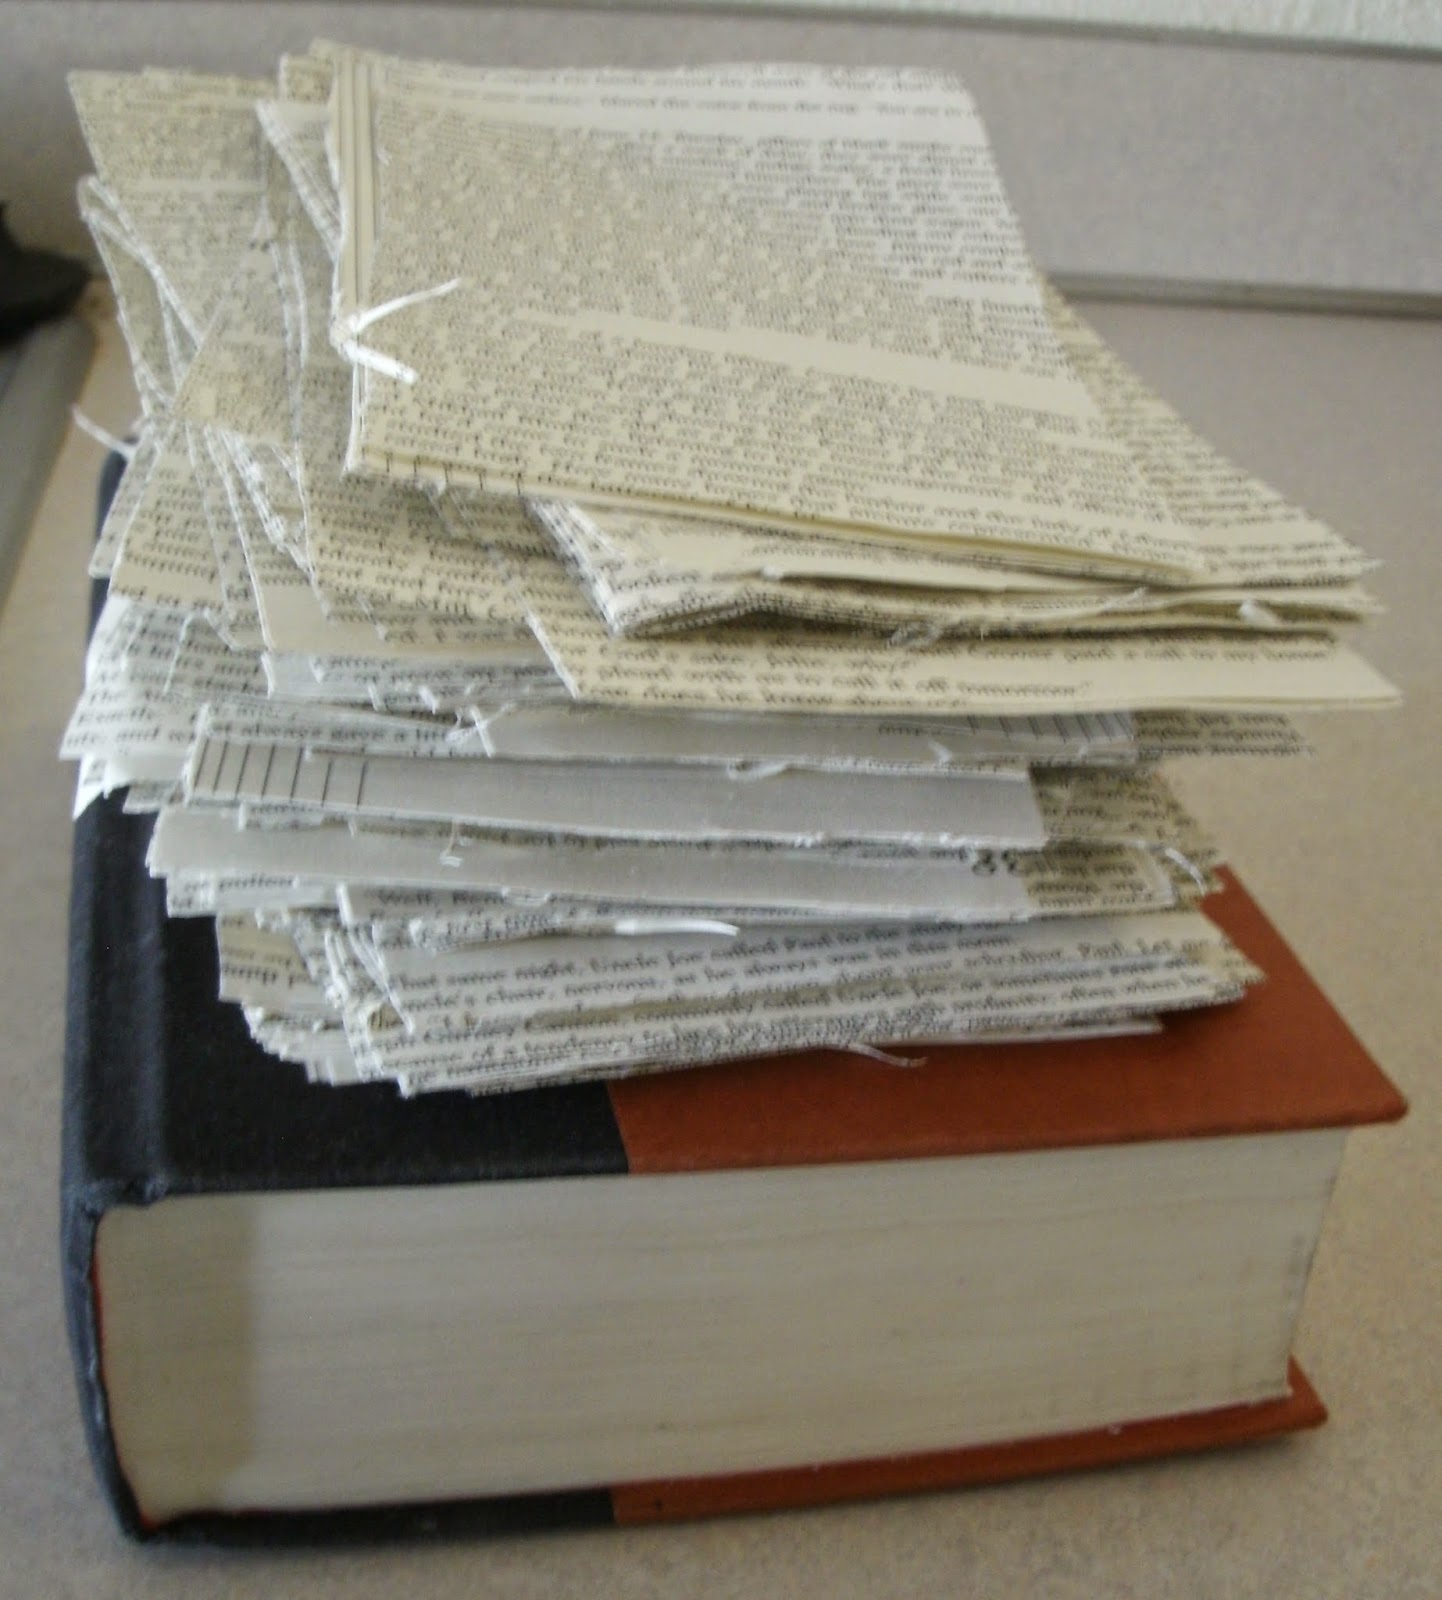
Once the glue was dry, and I had a day at home, the next step is cutting out the safe. I started by drawing the dimensions on the contents page, using my ruler I marked 1in in from the edges and just far enough in to cut out all the words on the contents page. Then I took my exact-o knife and cut down into the book removing a few pages at a time. The key to this is patience, I work slowly cutting out just a couple pages at a time, making sure my corners are well cut and my edges straight.


I did this over the course of two days as it does make my fingers really sore.


Now I need to glue the inside like I did the outside, I did this in two parts, the back spine bit first and the front bit second allowing time to dry in between. I have lined this inner cavity with fabric or felt before, it's pretty easy if you just lay the fabric in when the glue is sticky and cutting out the extra corner bits, but I'm not going to do that for this one since the edges turned out so straight and nice. 


So my next step is decorating the cover. The look is really up to the creator and I've left them plain or created intricate designs. This one is going to have an old world style with purple (my favorite color) tissue paper decoupaged over the top. I cut out these pieces from some cardboard drawing the design on some scrap paper to decide how big and what it should look like before cutting the cardboard. Then I glued them to the front of the book, eye balling whether it's centered.


Then I coated the top in mod podge and laid my first sheet of tissue paper over it pressing into the corners and not worrying about tears. I layered on a couple more pieces til I felt you couldn't see the different colors underneath.


Next I wrapped the edges around the front cover. I let this dry for awhile before moving on and doing the same to the back.


My last step was creating an interesting cover. I really liked the guy on the original dust cover so I decided to cut him out and use him. I also wanted a label for the front.


 And it's done!